Adjusting the Receipt Printer Paper Guides
Adjusting Printer Paper Guides
The paper guides on the rear of the printer and on the paper holder can be adjusted to hold different paper widths: 48, 56, 70, 76, 80, or 82.5 millimeters.
1.Remove the screw securing the guide.
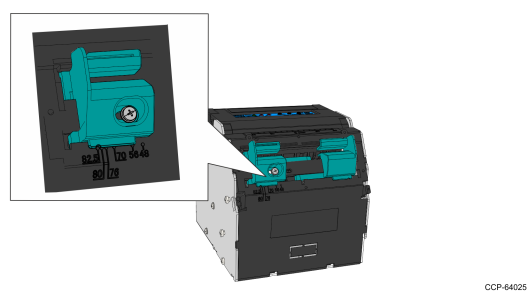
2.Slide the guide to the appropriate mark on the printer.
3.Secure the guide in place with the screw.
Adjusting Paper Holder Guides
The Paper Holder has two variants that have different procedures to adjust the paper guides. Refer to appropriate procedure according to what paper arm is installed in your printer.
Variable Paper Holder Arm
The paper guides on variable paper holder can be adjusted to hold different paper widths: 48, 56, 70, 76, 80, or 82.5 millimeters.
1.Remove the screw securing the guide.

2.Slide the guide to the appropriate mark on paper holder arm.
3.Secure the guide in place with the screw.
58/80 mm Paper Holder
The paper guides on the 58/80 mm Paper Holder can be adjusted to hold paper widths of either 58 or 80 mm.
1.Loosen the two screws at the top securing the paper guide to the paper arm.
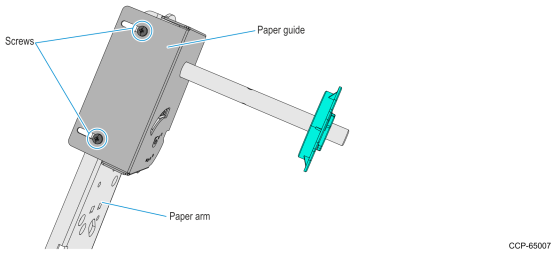
2.Remove the two screws at the bottom securing the paper guide to the paper arm.
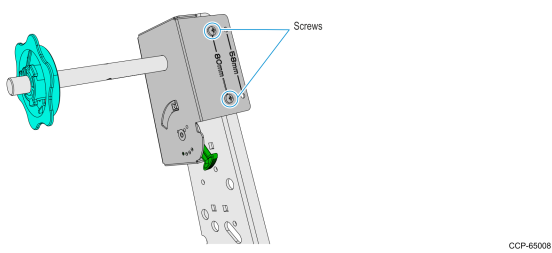
3.Slide the paper guide to align the paper guide mounting holes of the desired paper width to the paper arm mounting holes, and then secure with two screws.
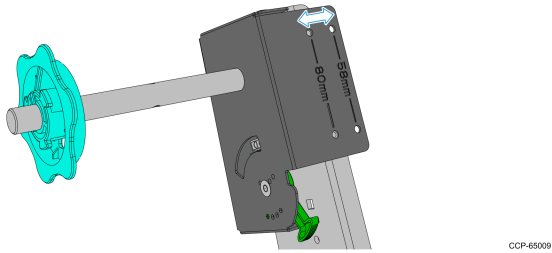
4.Tighten the two screws at the top securing the paper guide to the paper arm.
Adjusting the Paper Near-End Sensor Indicator
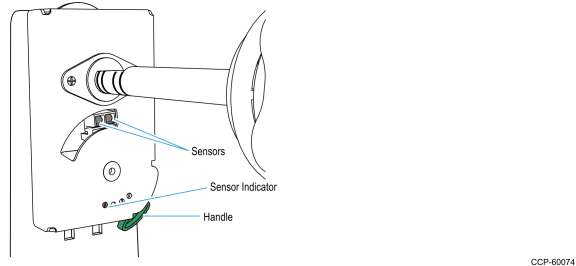
The Paper Near-End Sensor Indicator should be in the first slot as shown in the illustration below.
Use the green handle to move the Sensor Indicator from one slot to another.
